Kaltura Basics Guide
Kaltura Overview
Through Kaltura, you can upload videos to add to your Canvas course sites. Kaltura supports playlists, video clipping, machine captioning in various languages, and the ability to upload external caption files to help meet accessibility guidelines.
This basics guide is meant to get you started, but we will offer more information in future trainings and documentation.
In this guide, you will learn the following:
- Differences between My Media and Media Gallery
- How to upload your video File in My Media
- How to publish your video to your course site in Media Gallery
My Media vs Media Gallery
My Media
Because Kaltura’s My Media and Media Gallery have similar names, it is strongly recommended that you leave My Media hidden from the student’s view to avoid confusion. My Media is where you, the instructor, can see all of your videos, regardless of what course site they are published in. However, students will not be able to access the videos through My Media; this is each user’s own private media space.
Media Gallery
Students will only be able to access videos or playlists that you publish to your course site by using Media Gallery. Therefore, make sure the Media Gallery remains visible to students.
How to Upload Your Video Files to Kaltura
To upload, you will need to access My Media.
In the My Media tool, you can upload all of your videos, no matter the course, as it is your private media space tied to you as a user, not a course. If you upload videos to My Media in separate courses, they will all appear in your same My Media area. Students cannot access any content you have in My Media. They will only be able to see videos after you have published them to their course's media gallery.
- Access a course site in Canvas.
- Click on My Media on the left-side course menu.
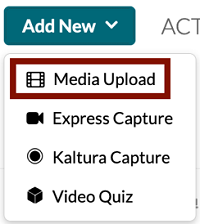
- Click on the 'Add New' button and select 'Media Upload' in the drop-down menu.

- Once you accept the terms & conditions, click on the 'Choose a file to upload' button (or drag and drop the file into the dashed box).
- In the file selection window, choose your video file where you have them stored.
- Click 'Open' to begin the upload.
- As your file uploads, enter details, such as the video name, a description, and tags.
NOTE:
- A progress bar will appear and may take some time depending on the original file size and video length. Stay on the page until you see the 'Upload completed!' message.

- Upload times will vary depending on your internet speeds and the size of the files you are uploading. Review the following as a guide:
- The average video file size of 1.2 GB x 10 files = 12 GB.
- 12 GB at the average home internet upload speeds of 10 Mbps to 20 Mbps = 1 hour 25 minutes to 2 hours 52 minutes.
- 12 GB at the average Pomona College upload speed of 100 Mbps = 17 minutes.
Therefore, use of campus internet is strongly encouraged for this process.
- Click 'Save' after you have entered the details.
NOTE:
You can click Save even if the upload is still in progress. You will remain on the same page.
- If you have another video to upload, scroll down and click the 'Choose another file' button and follow from step 5; repeat as needed.
Publish a Video
Once your videos are uploaded, you will need to publish any desired video to Media Gallery on your course site. Publishing a video to a course enables it to appear in that course's Media Gallery so students can view it. If you do not publish the media, students cannot access it.
- From the Media Gallery, click 'Add Media'.

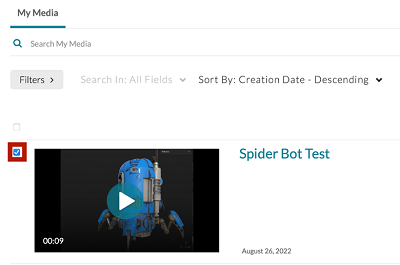
- Click the checkbox next to the video(s) you wish to publish to your current course site.
NOTE:
You may also click the top-most checkbox to select all videos.

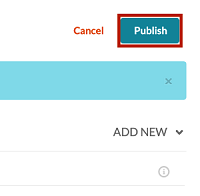
- Once all needed videos have been selected, click the 'Publish' button at the top right of the page.
NOTE:
If you have scrolled down, you will need to scroll to the top to view the Publish button.

Your video files are now uploaded to your Kaltura My Media account and published to the Media Gallery space of the course you indicated.
Student View of Media Gallery
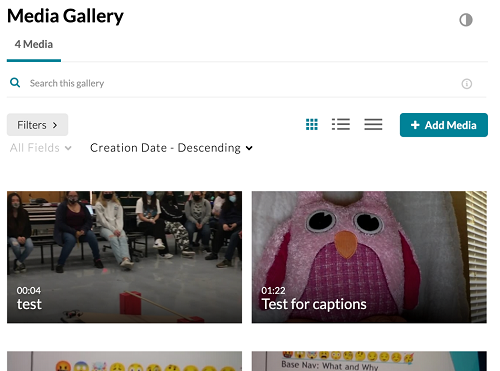
To access the videos, students will click on Media Gallery in the course navigation menu, which displays thumbnails of the videos you published.
Unlike My Media, the Media Gallery is specific to a course site. Therefore, students will only be able to see the videos you have published to their course.
