Install a Department Canon Copier on a Pomona College provided Mac
NOTE:
-
Click here for other Network Printing (General Information & Troubleshooting) information.
- To install a Canon Copier on a Personally-owned Mac, please click here.
-
Automatic toner monitoring has been configured for all the large department Canon Copiers on campus. Toner will be delivered automatically to those department in need of toner. If your department does not receive toner in time, please contact the ITS Service Desk at ServiceDesk@pomona.edu.
-
For physical problems with a department Canon Copier (does not turn on, jams repeatedly, something physically broke, etc.), please contact the Canon Customer Support Hotline at 800-355-1385.
- These instructions are optimized for MacOS 15 (Sequoia). Other versions of the Mac OS might require minor variations in the configuration.
CAUTION:
The instructions below will show one how to setup Canon copier printing on a Macintosh computer with the Procedures below:
Part 1: Install a Canon Copier on Pomona College provided Mac
Steps:
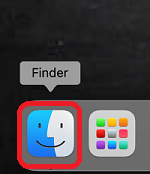
- Open a new Finder window by clicking on the Finder icon on the Dock.
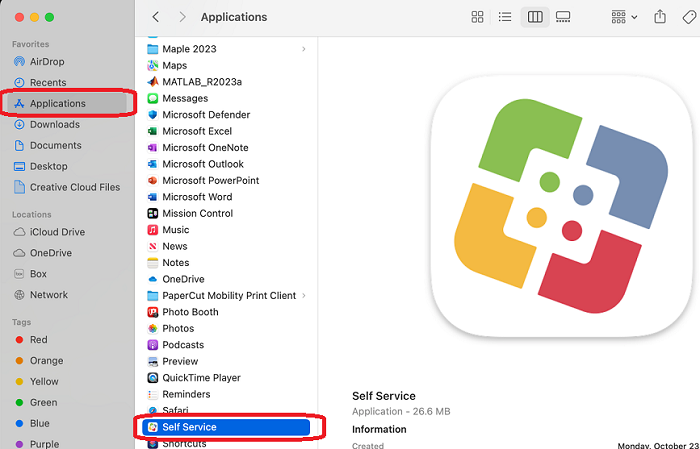
- On the left side of the Finder window, navigate to Applications on the left then open the Self Service application.
- Once you are in Self Service, click on Featured in the left-hand panel, then click Setup under Setup Canon Copiers.
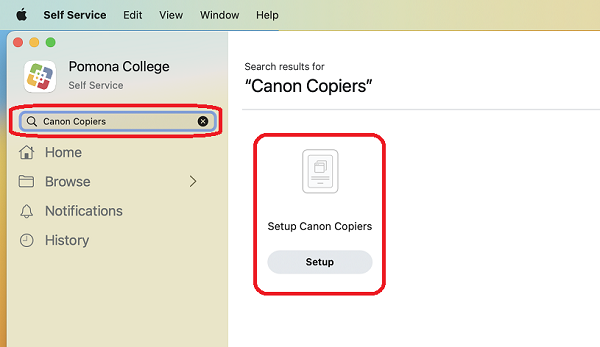
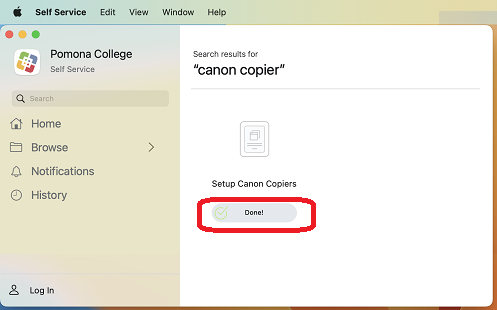
- In Self Service, do a search for 'Canon Copier'. In the search results, select 'Setup Canon Copiers' (click 'Setup').
NOTE:
The installation may take a few minutes to complete. It is installing the software for the copier.
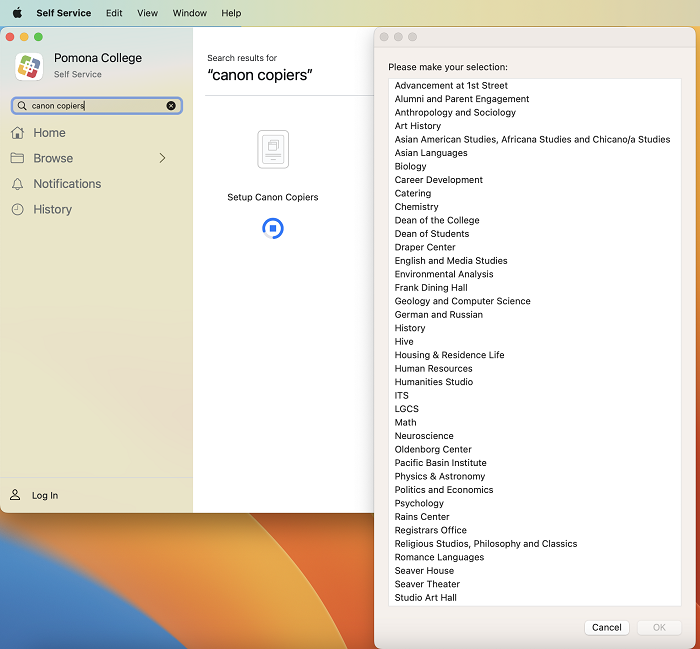
- The status indicator will spin -- THIS CAN TAKE A LONG TIME. When it is ready, a list of departments with Canon Copiers will appear next. Select your department listing.
NOTE:
If you do not see you department listed, please report that to ITS at ServiceDesk@pomona.edu .
- The Canon Copier is installed when you see 'Done'.
Part 2: Configure Special Features of a Canon Copier
If there are special features (such as staplers or hole punchers) or settings (such as a department code or PIN) for your copier, you will need to follow the instructions below to make them available.
NOTE:
The options available on a Canon Copier will vary between departments. Please check with your department coordinator or Canon representative to find out what options are available on your department Canon Copier.
- Adjust the Canon Copier 'Options'.
For Mac OS 12 (Monterey) and before
For Mac OS 13 (Ventura) and beyond
- Click on the Apple menu (upper left corner) and select 'System Preferences'.
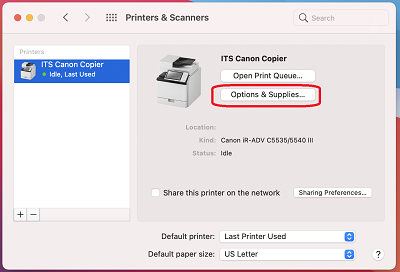
- Click once on the newly added copier and click Options & Supplies.
- Click on the Apple menu (upper left corner) and select 'System Settings'.
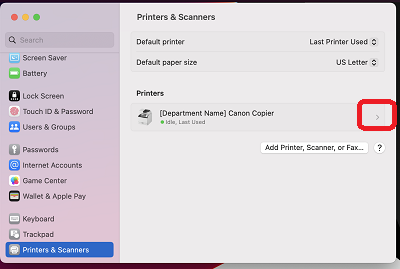
- Click on the right pointing angle bracket by the newly added copier.
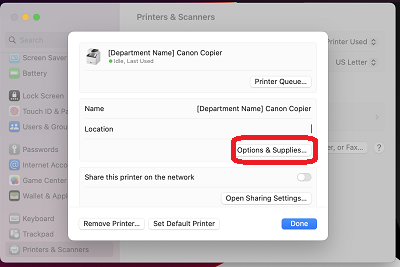
- In the Windows that opens, and click Options & Supplies.
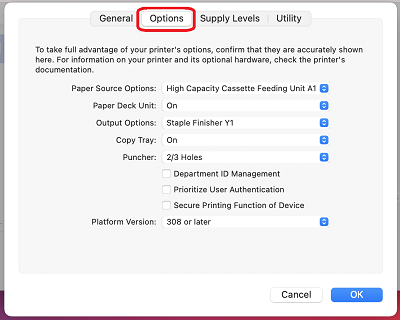
- Click on the 'Options' tab. Choose the staple, hole punch and other options (may look different between copiers), like below.
NOTES:
- VERY IMPORTANT. If you log into the copier with a Department ID and/or PIN to use it (for scanning, copying and faxing), check the 'Department ID Management' option. If you do not use a Department ID/PIN for the copier, leave that option unchecked. Check with your department coordinator to see if you have a Department ID and/or PIN.
- Not all copiers will have the staple and hole punch features installed (most do though). Check with your department coordinator to see what features are installed on the copier.
Enable all the features that your department's copier has installed.
-
If you do not log into the copier with a Department ID and/or PIN when physically standing at it to scanning, copying and faxing, skip this step.
If you do use a Department ID and/or PIN: make sure the 'Department ID Management' option is checked.
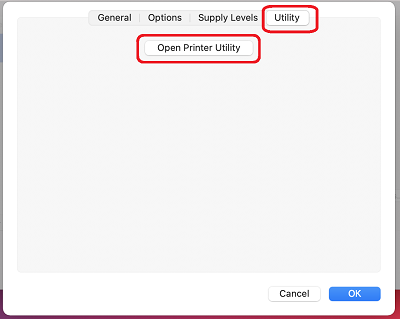
- Click on the Utility tab and then click on Open Printer Utility.
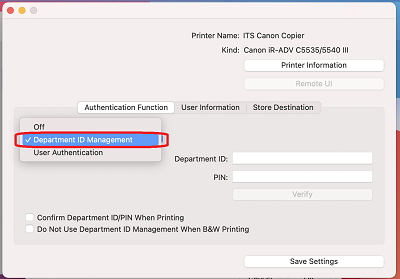
- Change the 'User Management:' option to 'Department ID Management'.
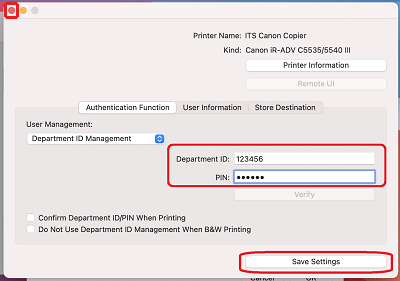
- Enter your Department ID and PIN (level blank if you do not have a PIN).
Then, click 'Save Settings' follow by the red bubble in the upper left corner to close the window.
NOTE:
If you don't know your Department ID and/or PIN, check with your department coordinator.
- Click OK (In Ventura and above, click OK and then Done).
You should now be back at 'Printers & Scanners' window.
The copier is now ready to use. However, the first time you go to printer, you will need to authenticate with the printer server:
- Print a document to the copier.
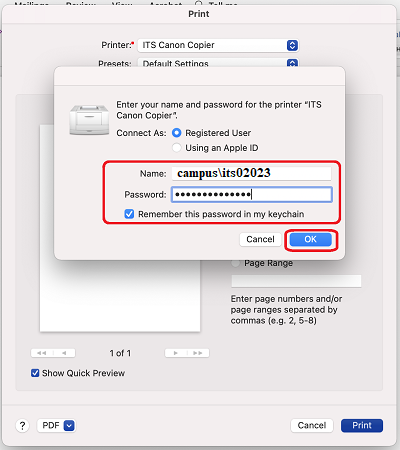
- When prompted, enter your Pomona College username in form of campus\username (e.g., campus\it02023) and password.
Check the Remember this password in my Keychain option.
- Click the Print button.
NOTE:
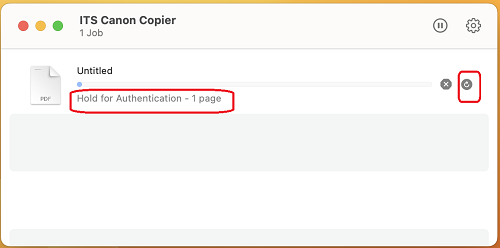
If you receive a message stating 'Hold for Authentication' message, click the retry icon on the right. Re-enter your Pomona College username in form of campus\username (e.g., campus\its02023) and password.
The document will print.
The setup is complete.