Creating and Maintaining Project Sites in Sakai
Outside of your automatically-generated course sites, you may create your own “Project Sites” for other academic groups or activities for which it may be useful to you to have a Sakai site.
Please note that project sites, unlike course sites, are not maintained by Pomona College ITS. In creating project sites, you are the sole site owner. If other users need access to your site you will have to grant it. If you need ITS assistance with the site, one of us will also need to be added. Project sites are never deleted.
What is a Sakai Project Site?
A Sakai Project site is a Sakai site that is created by a Sakai user. This is different from a Sakai Course site which is generated automatically for academic courses. Any registered Sakai user can create a project site. By creating a project site user becomes the “owner” of that site. If you are the owner this means that you can do anything to the site such as, adding tools, adding users, controlling settings, and more. You can even appoint other users to the “maintain” role and they can effectively become an owner or co-owner of that Sakai site. Sakai Project sites never expire. They are only deleted if you remove them yourself.
Why is it important that you make your own project sites?
It is imperative that you make your own Project sites because you want to be the “owner” and you want to have the ability to control the site. ITS cannot create them for you. ITS does not have default access to already existing project sites. ITS does not know what Sakai Project sites even exist unless we are added to them.
How to make a Sakai project site:
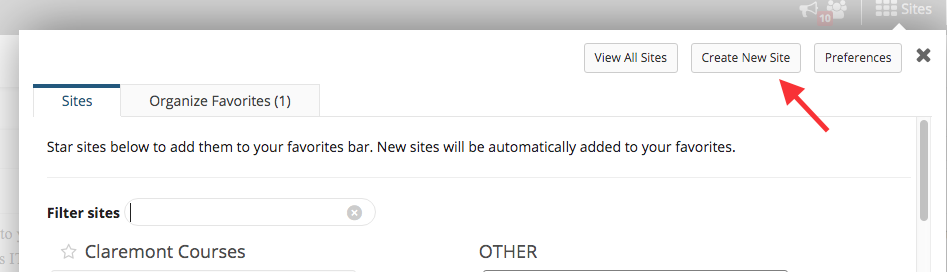
Step 1: Select the “Sites” menu towards the upper right-hand home page menu. Then select the “Create New Site” button.
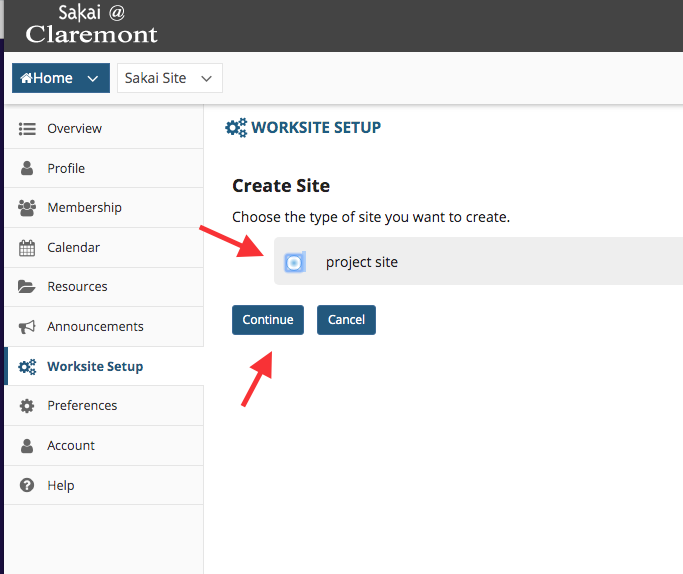
Step 2: Select the “project site” option and hit “Continue.”
Step 3: Follow the prompts to detail information about your site, until you reach the “Project Site Access” page. Examine the options for public or restricted access depending on the purpose of your site. The default options are for a private site though some public groups on campus find It useful to have publicly searchable and joinable sites. Select the best option for your site and click "Continue".
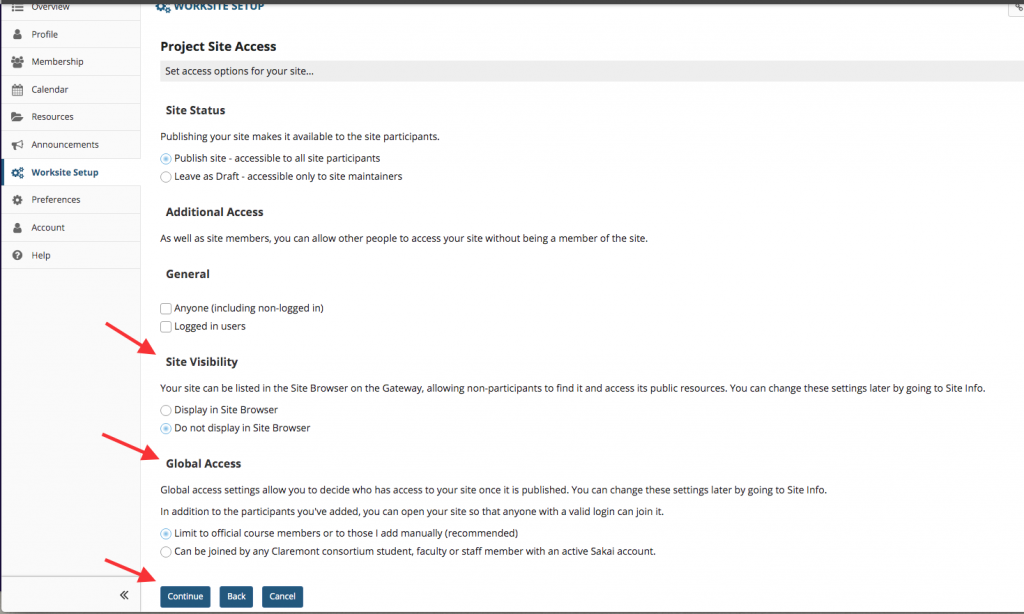
Please pay close attention to the "Access" settings and be sure to read all of these settings. If the settings are not correct, you may have unexpected visitors to your site. The “Access” settings can be changed if needed at any time, to be either more or less restrictive.
Step 4: You will be prompted to confirm the creation of your project site. Click the "Create Site" button to confirm.
The site should appear in your site list and as a tab. You are now the “owner” of your Sakai Project site.