Add a Shared Mailbox to Outlook for Mac
Use this method if you are a delegate for another user's mailbox or when you have permissions to several folders in a shared mailbox. You can also use this method when you have full access permissions to a mailbox.
Instructions for the NEW version of Outlook for Mac
(For the legacy version of Outlook for Mac, see the next section below.)
- Open Outlook for Mac.
- Click 'File'.
- Hover over 'Open' then click 'Shared Mailbox…'

- Type the name of the desired Shared Mailbox to add, then click 'Add'.
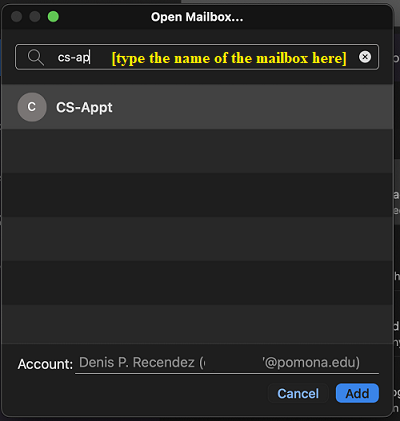
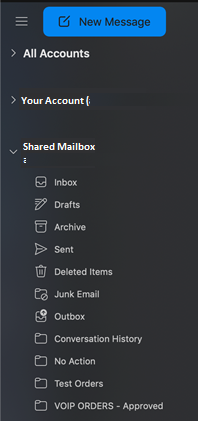
- The system will verify if your account has permissions to add the mailbox, and if so, it will now appear within the left side pane of Outlook. Be sure to click the arrow next to the mailbox name to expand the folder and see all sub folders such as 'Inbox', 'Sent', etc.
NOTE:
If you have permissions to custom folders in the mailbox but not to the top-level mailbox folder, the custom folders will not appear in the folder list. Only default folders that you have permissions to, such as Inbox, Sent Items, Deleted Items, and Calendar, will appear in the folder list without top-level mailbox folder permissions.
Legacy version of Outlook for Mac
To open the shared mailbox:
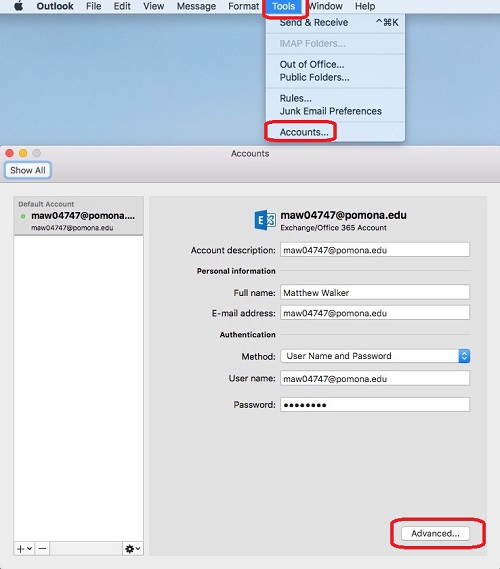
- In Outlook for Mac, click on the 'Tools' menu and select 'Accounts'.
- In the Accounts window, click on the 'Advanced' button.
- Click on the 'Delegates' tab and click on the add button ('+') under 'Open these additional mailboxes'.
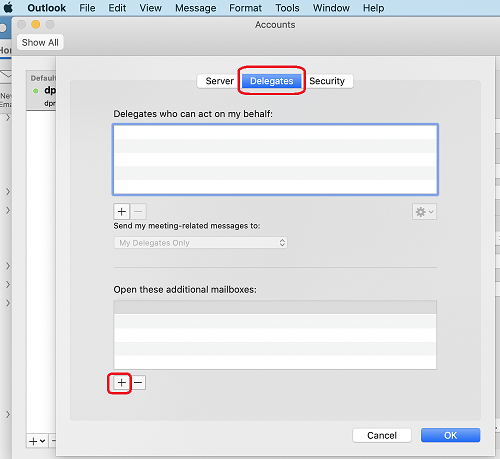
- Type in the name of the email address of the shared mailbox. Then, click 'Add'.
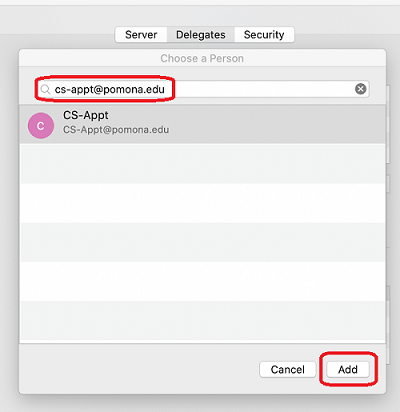
- Click 'Ok' and return the main Outlook window.
- After around a minute, the new shared mailbox will appear toward the bottom of the Outlook folder pane (on the left).
NOTE:
If you have permissions to custom folders in the mailbox but not to the top-level mailbox folder, the custom folders will not appear in the folder list. Only default folders that you have permissions to, such as Inbox, Sent Items, Deleted Items, and Calendar, will appear in the folder list without top-level mailbox folder permissions.